The question “How to Clip in Peloton Shoes?” is asked by almost everyone who starts using Peloton. For first-time users, putting them on can be difficult. Peloton shoes don’t look like regular shoes. They have velcro or lace straps. Peloton-specific soles and a locking system make them ideal for use on bikes.
How do you put on Peloton shoes, then? With this guide, you will manage to put on the peloton shoes successfully and clip in and out without a challenge.
Step 1 for the “How to Clip in Peloton Shoes?” answer. Install the Peloton Shoe Cleats
Peloton shoes must have cleats that support you when riding. The Look Delta cleats are available, or the Shimano cleats. When assembling Peloton shoes, it is crucial to attach the cleats.
You can do this by wearing the shoes and marking the bottom of the Peloton shoes. Then, trace the ball of each foot with a marker or pencil. This allows you to adjust the cleat’s middle by tracing the foot’s ball.
Next, use the markings to place the peloton cleats at your Peloton shoes’ bottom. For proper placement, you have to match the cleats with the three screw holes you see on the shoes.
The washer should be placed into the recess of your cleats. Set the washers into the leaves of the cleats and put a screw into each screw hole.
Use a 4-mm Hex key to tighten the screws and ensure the cleats are securely in place. You can repeat the process with the other shoe.
Pro tip: You can pedal and see if the pressure is going to your ball of the foot. If you feel uneasy, tighten the screws again.
Step 2. Loosen the buckles and unstrap the Velcro closure
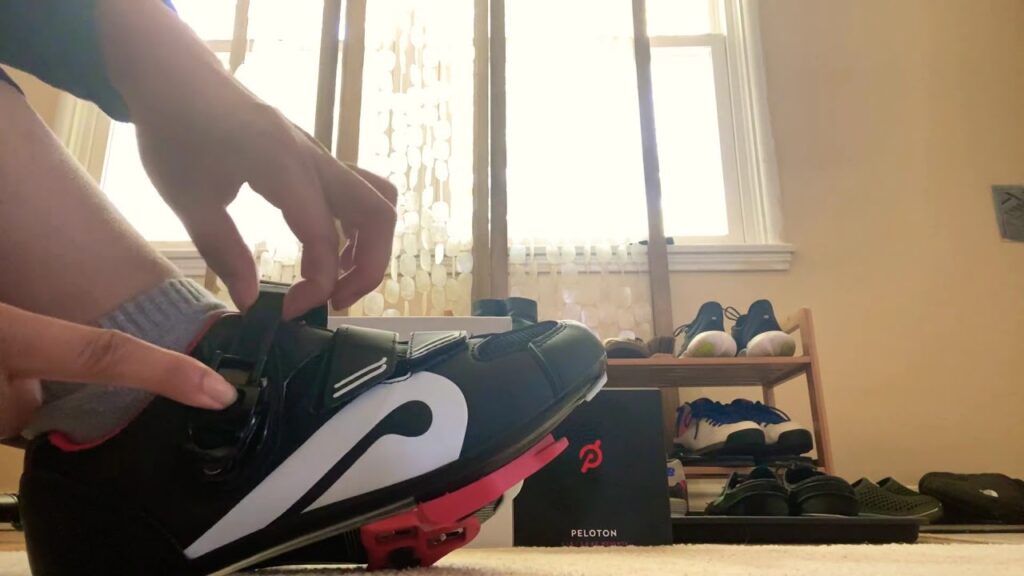
Peloton clip-in shoes can be equipped with Velcro straps or buckle closure. Shoes with buckle enclosures should be unfastened first. This can be done by pressing the button on the buckle and waiting for the buckle to open.
Next, adjust the buckle strap until there is enough room to place your foot. Next, you can unstrap shoes with Velcro-enclosed straps. Finally, you can pull the strap slowly until your foot is correct.
Step 3. Put on your Peloton shoes
Before you slide your foot into the Peloton shoe clips, put on your cycling socks. You should not wear shoes with no socks. You will feel uncomfortable, and your soles may be damaged.
When you put on the Peloton shoes, it is crucial to maintain your balance. Sitting on a chair will help you maintain your balance.
Next, place your foot slowly into the shoe. Finally, you should be able to put your foot entirely in the shoe. Then, repeat the process for the other foot.
Pro tip: Don’t leave your heels unattended when you put on shoes. Your foot should be entirely inside the shoe. In addition, you must ensure that your feet are correctly restrained and secured.
Step 4. Buckle Up the Shoe
After your feet feel comfortable, tighten the shoe enclosure. Next, pull the string through the loop at the buckle. Then, secure the shoe by lifting the buckle button.
You can adjust the tension of the straps if they are too loose. You can do the same thing with your other foot. You are now ready to start riding your Peloton bicycle.
Step 5. Clipping your Peloton shoes into your bike
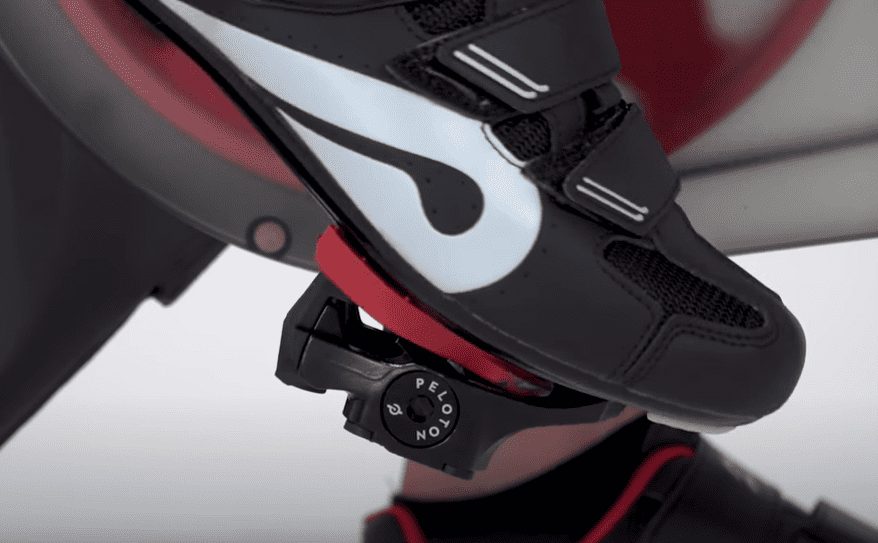
It would help if you clipped your Peloton shoes before you could ride your stationary bicycle.
You can do this by standing with your legs separated on each side of the Peloton bike. To ensure a successful clipping, you must stand straight up. To balance, you can use the handlebars while reaching the bike pedals.
Next, place your foot in the opening of the pedal by pointing your toe down. You should ensure that the cleat covers the pedal’s space.
After you have noticed the pedal and cleat attach, push your heel until you hear the click in peloton shoes. This signifies that your shoe has already been inserted into your pedal.
If your Peloton shoe cleats are not clipping incorrectly, you can wiggle your shoes from side to side. In addition, you can recheck the attachment if your Peloton shoes are slipping or causing a slight wiggle.
Two Types of Cycling Shoes for Peloton
Peloton currently offers two types of cycling shoes, starting in 2022.
- The first cycling shoes on the market, the standard.
- Altos’ cycling shoes are more recent.
What’s the difference between the Peloton and Peloton shoes? Both shoes are three-hole Look Delta cycling footwear.
Altos Peloton’s shoes are made from jacquard mesh which is lightweight and breathable. The shoe’s closure is simple, with a single velcro strap running across it.
The standard Peloton shoes feature a dominant leather upper material. The closure comprises three velcro straps and a top closure with a buckle.
How to put on standard Peloton cycling shoes
Peloton shoes are made of a rugged fibreglass outsole with cleats sticking out at the bottom. To maintain balance, you must sit down while wearing the shoes.
Are you ready to get out on the Peloton and ride? Let’s get started!
- Loosen the top Velcro strap by pressing down on the buckle on the outer side of your shoe.
- Next, you will need to put the shoe on, as you would for other shoes.
- Next, slide the Velcro through the buckle until it is snug and secure. Finally, snap the clip back on.
- Click the buckle button once more and pull the Velcro strap slightly until the shoe is tight. If the strap feels loose, click on it again and push it through the buckle.
- Two additional straps are available for the Peloton shoes. You can adjust the straps if the shoe feels too tight in the front.
How to put on Peloton Altos cycling shoes
- Take the hook from the loop of the Velcro strap and attach it to the shoe.
- Next, attach the strap to the circle.
- What happens if the shoe feels too snug or too loose? Altos only have one Velcro strap. It is zigzagged across each shoe’s closure. To adjust the shoe, you only need to change one velcro strap. The best thing about the Alto shoe is the lack of a buckle to attach the strap. Instead, the belt can be attached to a loop.
Clip in Peloton Shoes: Be Careful
- Before you go out on your Peloton bike, warm up. Warming up will make you feel more comfortable and increase blood flow to the needed areas. It also allows for a more excellent range of motion in your elbows, knees, and hips.
- Clip in smoothly and not abruptly
- Clip in not during high-intensity intervals or high-pace interval training.
- Perform a half-turn laterally while you pedal during a sprint interval.
- While riding, you must breathe through your mouth and not your ears.
- Stop immediately if you suspect something is wrong or the situation cannot be controlled.
- You can reduce your training to allow your body to heal correctly to ease joint pain after riding.
- Consistency and patience are the keys to success.
What are Clip in Peloton Shoes, and how do they work?
Clip-in Peloton sneakers are similar to indoor cycling shoes. Clip-in Peloton shoes are adapters that attach to SPD pedals. This clip was created for those who want to ride their peloton bike more often and not sweat while on the way.
While it is different on a bicycle, using a stationary trainer can still get a lot from the shoes. The Clip-in Peloton shoe is ideal for cyclists looking to improve their fitness without working up a sweat.
They can also be beneficial for those who are shorter. However, even though they can be worn with SPD pedals by taller people, it is still quite challenging to pedal the peloton bike while the shoes are on.
What are the advantages of Clip in Peloton Shoes?
- A clip on your shoes means your heels won’t slip when you walk out.
- It also offers more significant adjustments and tilts for better comfort.
- Finally, you can use some clips to provide additional ventilation and padding for your feet while working out.
FAQ
How do I determine if my Peloton bike works with the Peloton Clips?
Your shoes and bike must have SPD-style cleats. For assistance, call customer service at
Can one pair of Peloton clips be used with multiple teams?
Yes, you can use one pair of Peloton Clips with multiple shoes. The shoe is what connects to the clip. The majority of shoes will fit both large and small size clips. If you are not sure, please check with your shoe manufacturer.
Do I need two pairs of clips?
No. You can order two pairs of Peloton, and you will get everything you need for Peloton for two.
Is there any benefit to using a clip?
Yes. Because they attach to a large flat surface, Peloton Clips offer more stability than regular SPD cleats. This allows you to enjoy the full benefits of Peloton’s continuous training style.
How to Put Off Peloton Shoes
Again, you will need to remove the peloton shoes as soon as you are off the bike. Remember that even if you managed to walk in uncomfortable shoes, you could cause damage to your bike mat with the cleats. So, once you hop off the bike, get comfortable seating. Then, press the buckle button to release the strap. Pull the strap off the buckle; then, you can slip your foot out of the shoe.
What makes it so challenging to remove Peloton from your body?
Peloton bikes are difficult to remove because of the difficulty of eliminating peloton pedals from the cleats. Doing this with the normal unclipping process shouldn’t take too much effort. You should look into a mitigation procedure if it is.
Can two people ride on the same peloton bike?
Even more than two people will ride on the Peloton bike. If not all of you have the shoes, peloton toe cages will come in handy. So, each one can log in to their account, yet the Peloton bike is the same. You can make it a family workout equipment at will.
Conclusion
This article will show you how to clip your Peloton shoes. The report concluded with some quick tips to help you cut into your pedals. These instructions should help you feel more confident using your Peloton Shoes and clipping into your pedals. You can ask any questions in the comments.
We are grateful that you have read this article. Please share this article with friends if you find it useful.