You might be asking, “How to remove valve stem core”? It’s not tricky, and instead of heading to the bike shop or mechanic, you can accomplish it yourself without difficulty.
The quality of the bicycle’s tires and the air pressure within them are essential for a smooth and comfortable ride. It can be very difficult and even dangerous to drive with flat tires without tubes in your tire. This is why it is essential to examine and repair the bike’s tire and components regularly. Valve cores are a necessary component of the tire.
They contain a spring-loaded valve core, which is sealed by the air pressure inside the tire. Over time, valve stems can age, break, become brittle, or start to leak, causing severe tire problems and impairing the driving/ riding experience. When the valve stems start to leak, the tire will no longer retain air.
Different tire stems for valves are available, including Schrader and Presta valve cores. This is because a damaged valve core had to be removed by the tires frequently. So every time you set for a grueling climb on an excellent hybrid or mountain bike or an urban ride on a perfect road bike, check the valve core to ensure the best performance.
What tools do I require for remove valve stem core?
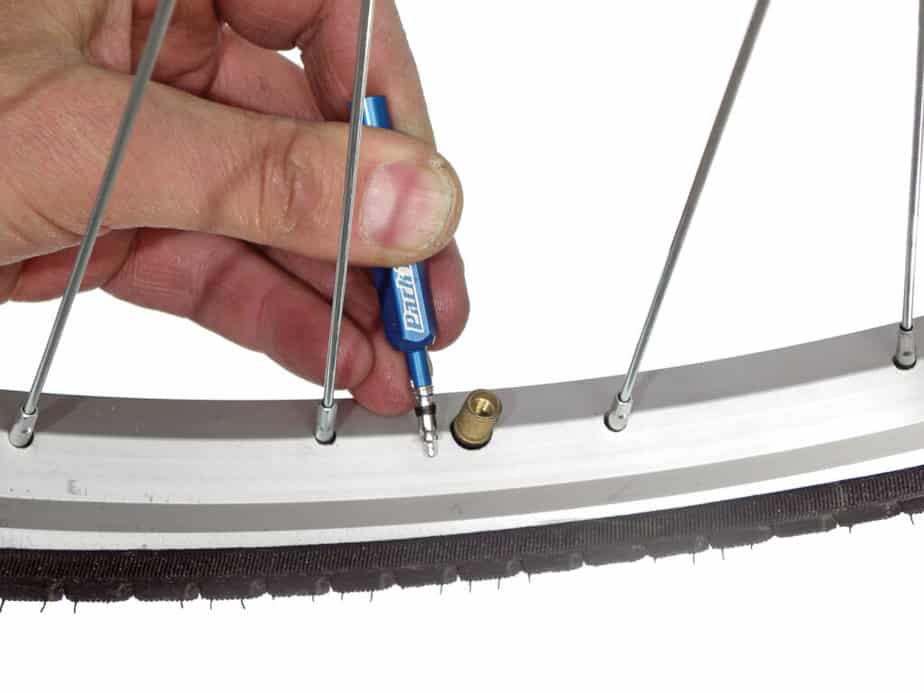
Tools for removing the valve core need two or more specific valve core remover tool. Tools like a wrench, screwdriver, Allen key and so on. Used for bicycle parts won’t be helpful in this case. Although it is possible to remove valve core with no tools, the tools make the process easier and more effective.
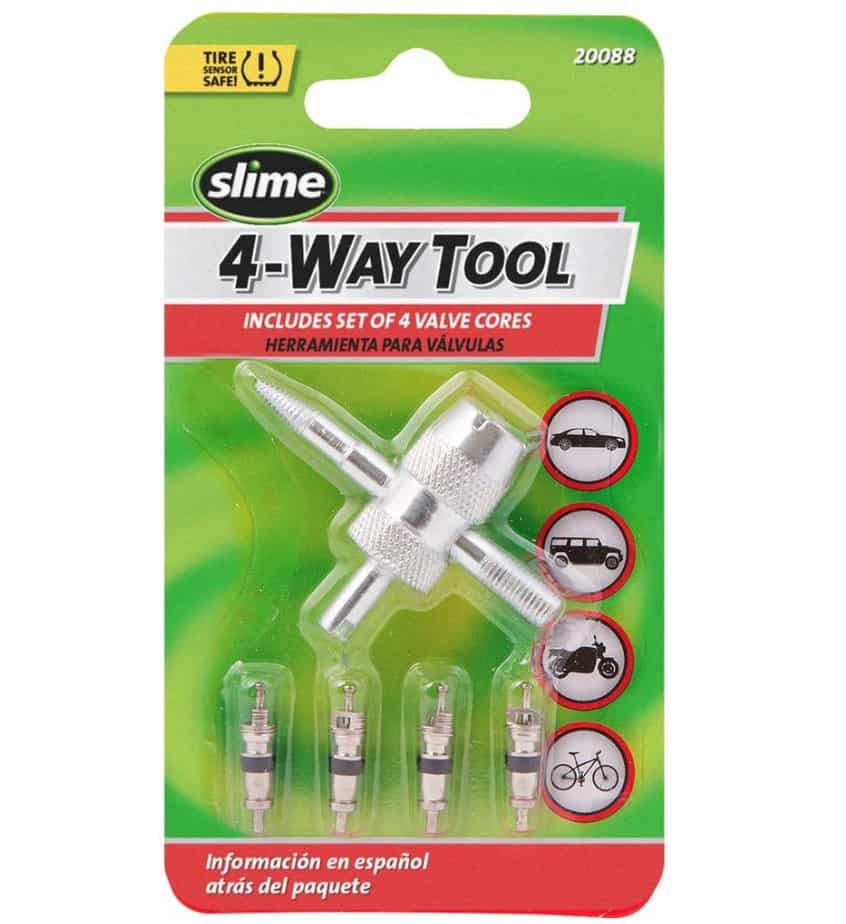
It is compatible with all valves in your vehicle and air cooling units. Additionally, it is an affordable and essential item to deal with tire issues.
How to Replace a Tire Valve Stem
We prefer to take off a valve core when the tire leaks. To repair the leak, it is necessary to take out and replace the valve core and then apply sealant. However, you must always follow the correct method using tools to remove the valve’s stem and seal the valve with sealant. Here’s how to resolve the issue and the procedure for getting rid of the valve core.
Step 1
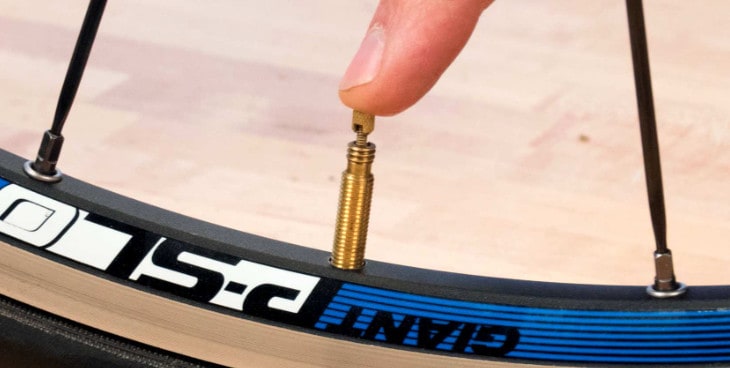
Start by putting the tire so that the stem is moving upwards. It’ll be easier to take off the valve stem core later.
Step 2
Your first step is to remove the valve cover. Take off the valve cap and the lever for the tire. It can be done by using your hands. The hat is tiny in dimensions. Make sure to keep it in a secure location to ensure that you do not lose it.
Step 3
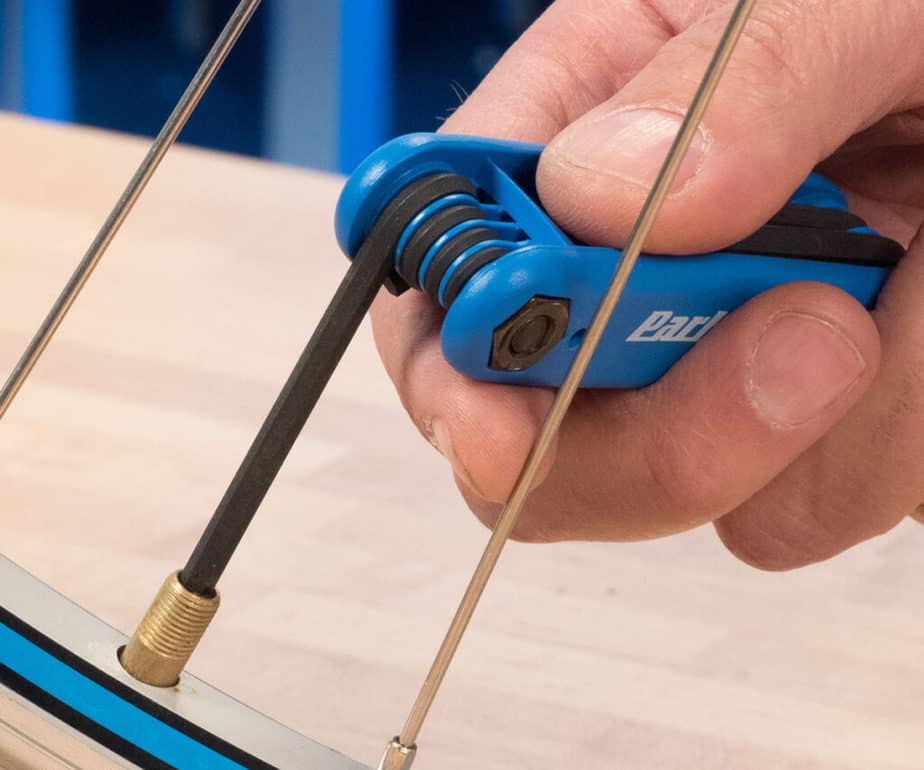
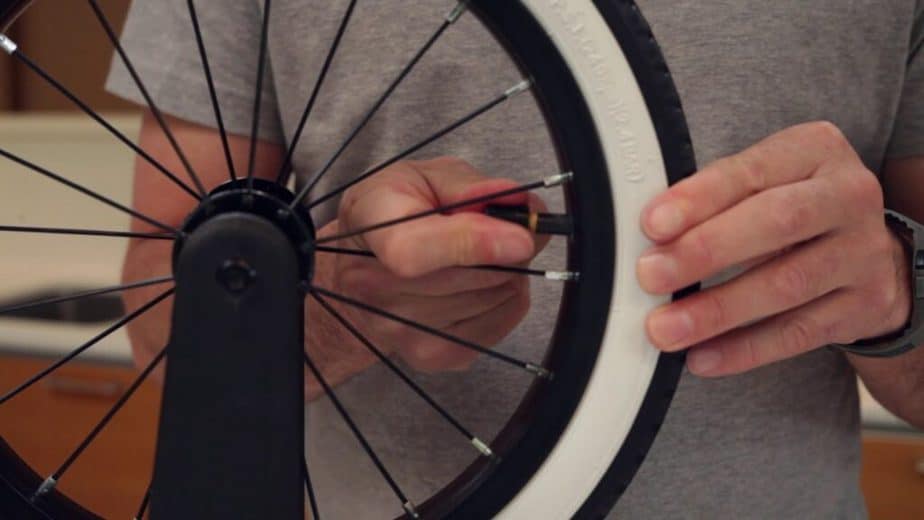
We’ve mentioned before that you could use any device to take off the core of your valve, the valve stem removal tool, or a slotted valve cap made of metal.
Insert a valve core removal tool or a slotted metal valve cap adn screw anticlockwise. Utilizing any of these tools, turn the stem of the valve counterclockwise several times before removing the stem.
The air in the tire will escape, and you’ll hear the air compressor. Be sure to wear eye protection when the compressor’s action takes place.
Step 4
To install the new valve core follow the same procedure as getting rid of the valve core; however, this time, you’ll have to spin it clockwise (always ensure that the proper specification is maintained). Continue to rotate until it is sufficiently tight.
Examine if the bead on the tire is in perfect balance or it is not. Then, make a few wheel moves. And you’re done!
Why You Should Regularly Check and Replace Tubeless Valve Cores
Valve cores on tubeless tires assist in maintaining the correct tire pressure within the tube that holds the tire, so we get the best grip and smooth ride, regardless of whether you’re using a Presta or Schrader valve. The recommended pressure for a tire is different for every type of tire, and the valve cores control the pressure.
Although a valve core is only a small component of a bike, it’s not a way to make it less significant. As with every other element in a cycle, the valve core must be checked regularly and, if necessary, replaced as fast as it is possible. Mainly when riding on mountain trails on a good entry-level mountain bike, the valve core can be damaged and may require an emergency repair.
It is essential to examine the valves on your bike, particularly for a flat tire. It’s not required to check the valve core only if the tire is punctured. You examine and replace the core of your valve. Sometimes, there are small leaks that aren’t noticed initially. If you don’t pay attention, the small leaks will continue to deflate the tire and can damage the inner tube. Too if there is a chance that you begin on a long trip, this could result in a major disaster for you. Apply tire sealant to stop the leakage of the tub’s centres (follow the correct method of injection).
An easy method to test whether the stem of the valve is in good shape or not is to apply sufficient amounts of soapy liquid to the valve’s stem. If the water begins to form bubbles, there is a small leak, and the core must be removed!
One crucial fact is that there is not every valve can be removed. This is why you should check before buying the bike whether the bike can perform the task or not. You might forget to perform the routine examination of the valve’s core. However, it’s an absolute requirement to complete before starting on a long ride.
Conclusion
Removing a valve’s core is a vital and straightforward job for all wheels to ensure the best pressure on the bike tire. It is done in 5 to 10 minutes with no assistance from anyone. If you are a professional cyclist, you are likely to frequently inspect their bikes’ valve cores. Sometimes rough riding necessitates checking valve cores. Of course, when fixing a punctured or flat tire, removing a valve core is an essential step.